
Operations
Viewing Recorded Expenses
#Overview
This document provides step-by-step instructions on how to view recorded expenses in the system.
#Steps to View Expenses
#Step 1: Access the Expense Management System
- Log in to the system using your credentials.
- Navigate to the "Expenses" section on the dashboard.
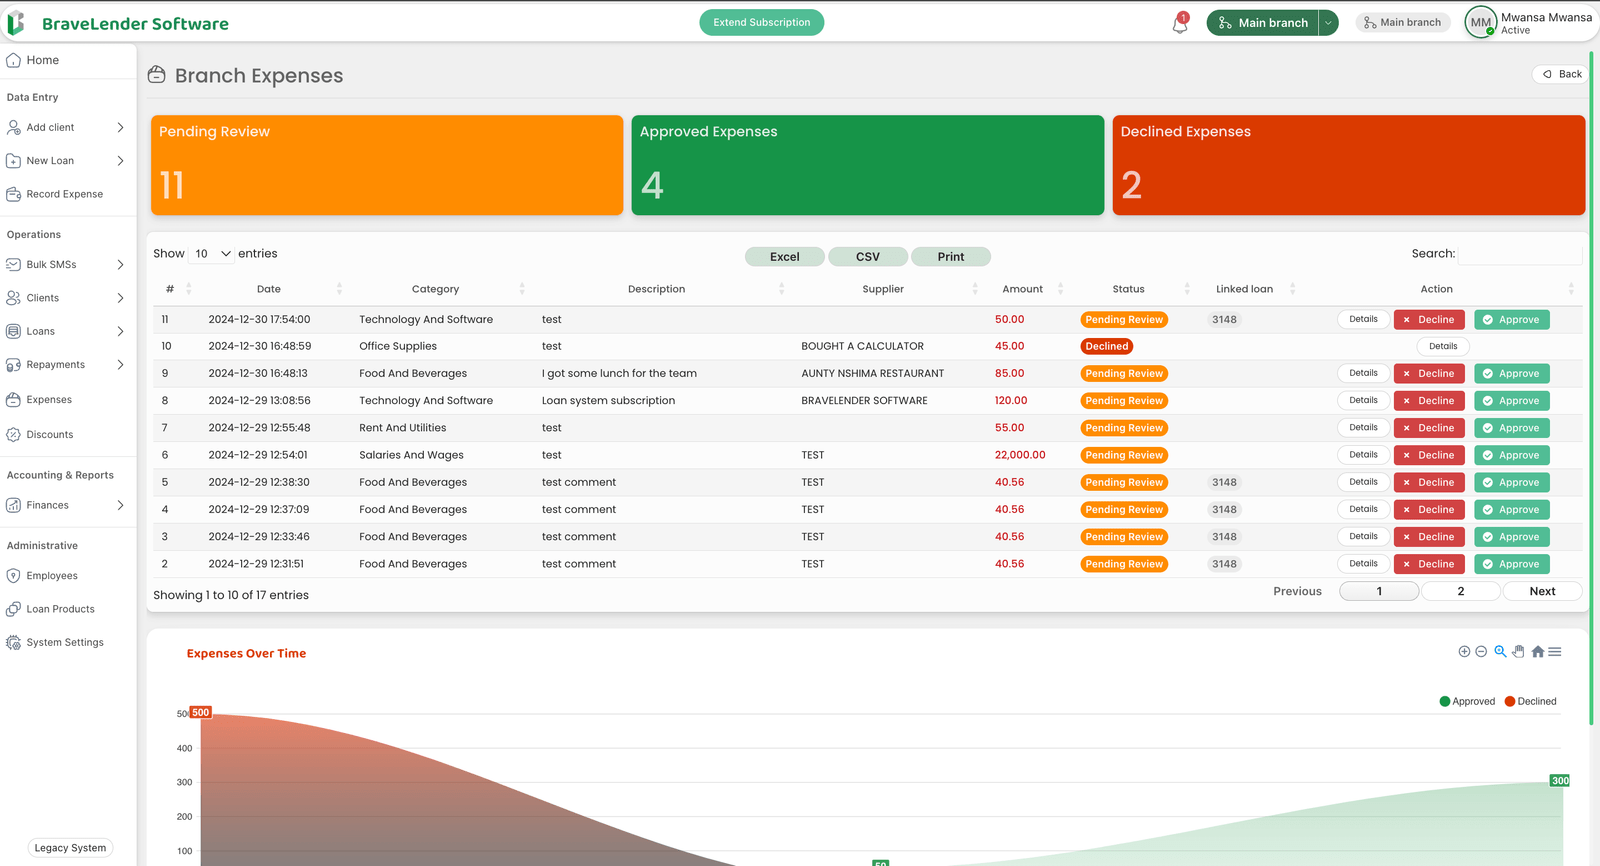
#Step 2: View Expense List
- Click on the "View Expenses" tab.
- A list of all recorded expenses will be displayed, including:
- Expense Category/Type
- Amount Spent
- Date of Expense
- Supplier/Company
- Loan Number (if applicable)
- Description/Comments/Narrations
- Attached Files (if available)
#Step 3: Filter and Search Expenses
- Use the search bar to find specific expenses by:
- Expense Category
- Supplier/Company Name
- Date Range
- Loan Number
- Apply filters to narrow down the list based on selected criteria.
#Step 4: View Expense Details
- Click on an expense entry to open detailed information.
- View all associated details, including uploaded receipts and invoices.
#Step 5: Export or Download Expense Records
- Click on the Export button to download expenses in CSV, Excel, or PDF format.
- Select the desired format and save the file to your device.
#Notes
- Ensure you have the correct access permissions to view expense records.
- Use filters effectively to find relevant records quickly.
- If an expense entry appears incorrect, verify its details or contact the administrator for corrections.
#Conclusion
Following these steps ensures efficient tracking and management of recorded expenses, helping with financial monitoring and reporting.