
Operations
Viewing Individual Clients
The BraveLender allows you to easily view detailed information about individual clients. This guide will walk you through the steps to access and review client details.
#Prerequisites
Before viewing individual clients, ensure the following:
- Client Records: The client you want to view must already be added to the system. Refer to the Add New Individual Client guide if needed.
- Permissions: You must have the necessary permissions to access client details. Contact your administrator if you encounter any issues.
#Steps to View Individual Clients
Follow these steps to view individual client details:
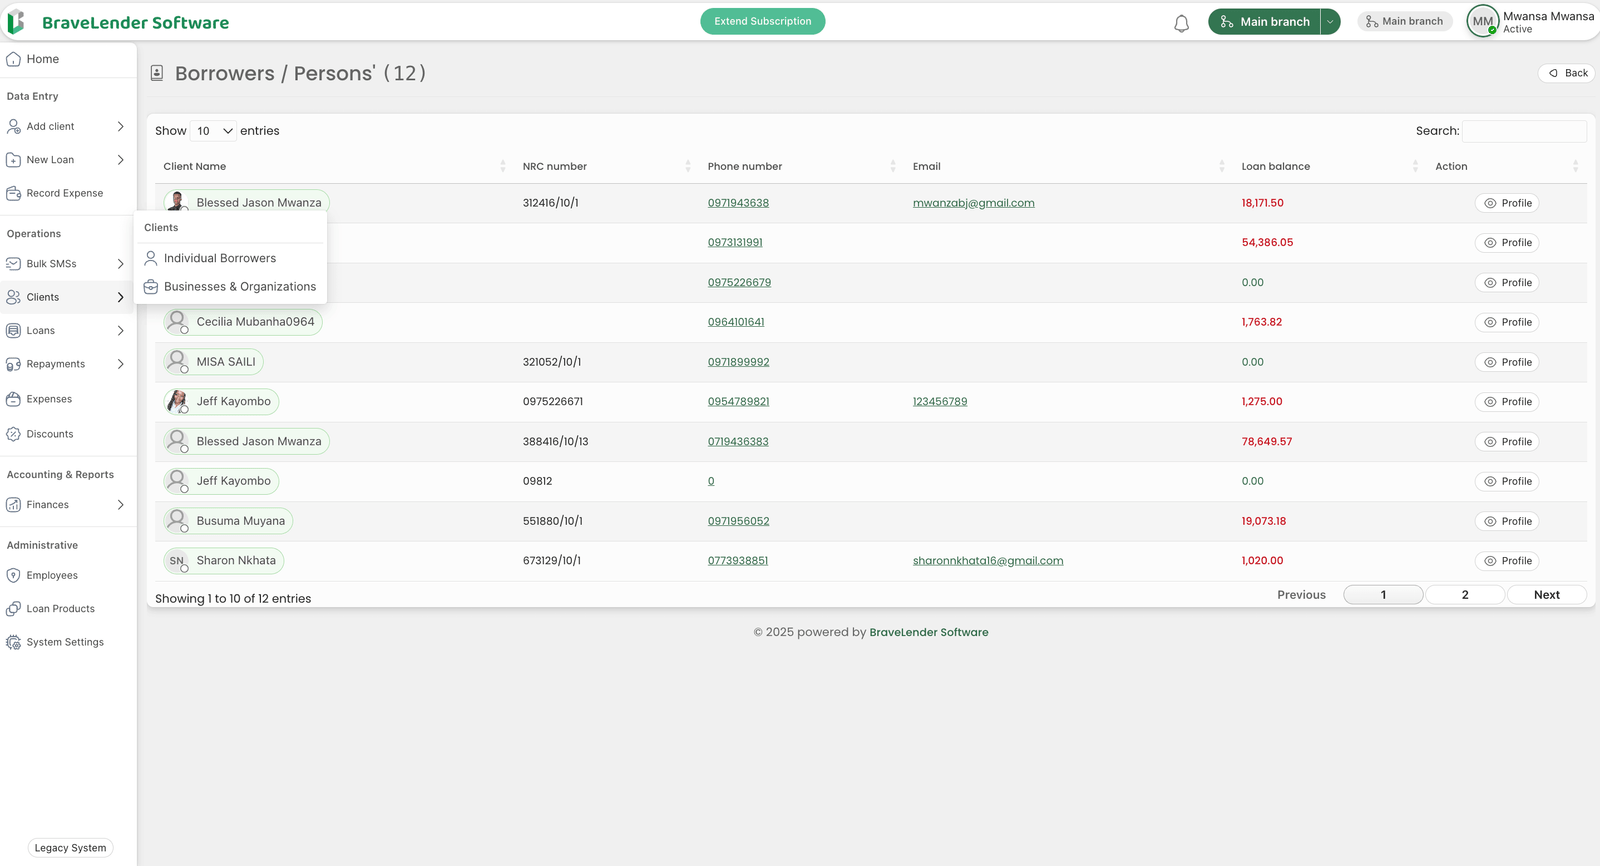
#1. Navigate to the Clients Page
- Go to the Operations section in the sidebar.
- Click on Clients.
#2. Search for the Client
- Use the search bar at the top of the Clients page to find the client.
- You can search by:
- Client Name
- Client ID
- Phone Number
#3. Open the Client Profile
- Once you locate the client in the list, click on their name or the View Details button next to their entry.
- This will open the client's profile page.
#4. Review Client Details
On the client profile page, you can view the following information:
- Personal Information:
- Full Name
- Date of Birth
- Contact Information (Phone, Email, Address)
- Account Details:
- Client ID
- Registration Date
- Account Status (Active, Inactive, etc.)
- Financial Information:
- Outstanding Loan Balances
- Payment History
- Credit Limit
- Additional Information:
- Notes or comments added by staff
- Attached documents (e.g., ID copies, contracts)
#5. Perform Actions on the Client Profile
From the client profile page, you can perform additional actions, such as:
- Edit Client Information: Update the client's details by clicking the Edit button.
- View Loan Details: Access the client's loan history and current loans.
- Send SMS: Send a personalized SMS to the client directly from their profile.
- Add Notes: Add internal notes for the client.
#Best Practices
- Keep Client Data Updated: Regularly update client information to ensure accuracy.
- Use Search Filters: Utilize filters to quickly find clients based on specific criteria.
- Secure Sensitive Data: Ensure that only authorized personnel have access to sensitive client information.
#Troubleshooting
If you encounter issues while viewing client details, consider the following:
- Client Not Found: Verify that the client has been added to the system.
- Permission Denied: Check your user permissions or contact your administrator.
- System Errors: If the page fails to load, check your internet connection or contact technical support.
For further assistance, refer to the System Settings documentation or contact your system administrator.